Thursday, September 30, 2010

My Breastfeeding Experience - Part 7 (16th Month)

Shern is a week short of 16-months old, and I am STILL breastfeeding him. Yes, we are still going strong. But I have not been touching my Avent Manual Pump for a month or so - it's all direct feed now.

Actually, I had started giving Shern Anmum Essential formula for about a couple of months already. I started doing so because I initially wanted to wean him off gradually and introducing formula was one of the way to do so. But then Shern had chicken pox and thus, weaning plans were delayed.

Introducing Shern to formula needs a lot of patience. He refused it initially. But I kept on making him formula milk (about 2-3oz) every time he asks for milk. He took a sip and then refused it. But after two weeks or so, he started drinking a little of it. Just like Dr. Chiah advised, baby needs time to get used to the formula taste.

Up until now, he will drink the formula only when I am not around. If he sees me, he sees his 'milk-milk' underneath my clothes and will tug at my clothes to ask for it.
So since I have plans to wean him off real soon, I stop expressing and just let him suckle whenever he wants to.

And these few days, since Shern eats a lot of other different food, he suckles only for fun. Not because of hunger. And he seldom suckle during the night. The pacifier does the job to soothe him back to sleep. So I guess this is a good sign that he is ready to be weaned off my breasts completely.

Well, wish me luck peeps!


Click here to follow Shern's Breastfeeding Journey:

Tuesday, September 28, 2010

Colourful Fruit Tart


28 September 2010 - Colourful Fruit Tart

Saw some beautiful big strawberries at Cold Storage for a reasonable price. Grabbed two boxes and then was scratching my head on what to bake using these strawberries. Since I also have some kiwi fruits left in the fridge, decided to bake a tart and then garnish it with fruits.

So I went fruit tart recipe hunting and settled on Happy Home Baking rainbow tart recipe. Her tart looks so amazingly beautiful that I just had to bake it.

This is what the tart looks like just out from the oven.


After it was cooled down completely, I spread it with St. Dalfour Wild Blueberry Spread.


Then I arranged the top of the tart with fresh strawberry slices, kiwi fruits and some of the leftover blueberries. Doesn't it look colourful?


Biting into a piece of the tart is so satisfying. I think the key to success for this tart is the St. Dalfour spread. It is not too sweet and just right. I love the buttery crust as well.
The tart is too small - not enough to satisfy my cravings. I am going to bake the same thing again tomorrow!


Recipe: Colourful Fruit Tart (copied from Happy Home Baking blog)

Ingredients:
(make one 18cm tart)

pastry:
80g flour
20g ground almond
30g caster sugar
40g unsalted butter, soften at room temperature
1 tablespoon (15g) lightly beaten egg

filling:
2 teaspoon flour
40g ground almond
3 tablespoon brown sugar
30g unsalted butter, soften at room temperature
30g egg, lightly beaten
1 teaspoon vanilla extract

some blueberry jam
fresh fruits of your choice, sliced and well drained
icing sugar for dusting

Method:
Pastry base:
  1. Lightly grease an 18cm tart pan, set aside.
  2. Toast ground almond at 100 degC for 10 mins. Stirring in between. Let cool.
  3. Sieve flour and ground almond.
  4. With a manual whisk, cream butter and sugar till light and fluffy.
  5. Add in the egg, very gradually, whisking the batter till well mixed each time the egg is added.
  6. Sieve over the flour/ground almond mixture in 2 to 3 additions into the batter. Fold the mixture gently with a spatula.
  7. Form and shape the pastry into a round ball. Roll out the pastry in between 2 sheets of cling wrap or baking paper (I used two sheets of cut-out plastic bags) to about 23cm in diameter.
  8. Remove one side of the cling wrap or baking paper. Place the pastry over the prepared tart pan. Mould the pastry into the tart pan, smoothing the edges and the rim carefully...if the pastry is too soft to handle, chill it in the fridge for 10~15 mins.
  9. Chill the pastry in the fridge for 20mins.
  10. Use a fork to poke holes on the pastry. Brush the top of the rim with egg wash. Bake in pre-heated oven at 180 deg C for 10 ~12mins until the edges are slightly browned. Let cool completely.

    filling:
  11. With a whisk, cream butter and brown sugar till the mixture turns fluffy. Add in the egg gradually, mix well each time the egg is added.
  12. Add in ground almond. Fold with a spatula till well incorporated. Sieve over the flour onto the mixture. Mix with a spatula. Add in vanilla extract and mix well.
  13. Spread the filling onto the cooled pastry base. Ensure that the edges are filled up. Bake in pre-heated oven at 170 deg C for 15 ~ 20 mins, until the surface turn golden brown. Let cool completely. Spread the top with blueberry jam and top with fresh fruit slices, dust the edges with some icing sugar.

Monday, September 27, 2010

Banana Blueberry Bread


26 September 2010 - Banana Blueberry Bread

This recipe is one of the easiest to make. You do not need an electric mixer. Just a large bowl and a spatula to mix in the ingredients and you are good to go.

This is one of the few recipes which I follow using the self-raising flour. Normally I use all-purpose flour. After the easy-to-follow and simple instructions, my batter was put into the oven.

My oven as usual needed slightly longer baking time than stated in the recipe. The top was slightly golden brown and you can see some of the blueberry and banana pieces on top. (yay...my blueberries did not sink to the bottom of the bread!)


Another thing though. Because this recipe yields such a small loaf, so it did not rise as high as I would like it too. Nothing wrong with the recipe, just that next time I will be sure to double everything, or maybe I will bake two loafs at the same time ;)

Well, look at the moist and crumbly loaf? You can feel the overall banana taste and yet there are some banana pieces you can bite onto. And no need to say, those blueberries are simple excellent.

Have I ever mentioned that I love blueberries in my bake? I don't like blueberry that much when eat off-hand, but they are certainly one of my favourite fruits when it comes to baking.


Recipe: Banana Blueberry Bread (copied from Happy Home Baking)

Ingredients:

(makes one loaf)

185g self-raising flour

20g butter

80g sugar

1 egg, lightly beaten

60ml low fat milk
(I used full cream milk)
1/2 cup mashed banana, about 2 (I used 4 medium-sized bananas)

1/2 cup fresh blueberries


Method:
  1. Preheat oven to 180 degree C. Grease 14cm x 20cm loaf pan; line base with parchment paper.
  2. Working over a bowl, toss the blueberries with about 1 ~ 2 teaspoon of flour in a sieve, and set aside. Coating the blueberries with flour helps to keep them from sinking to the bottom of the muffins as they bake.
  3. Sift flour into a mixing bowl, rub in the butter with fingertips.
  4. Stir in sugar, egg, milk and mashed bananas. Do not over mix, the batter should be lumpy. Gently stir in blueberries and spoon mixture into loaf pan.
  5. Bake for 30 mins or until skewer inserted into the centre comes out clean.
  6. Remove from oven, let cool for a few mins. Unmold and leave to cool completely.

Sunday, September 26, 2010

Smiles and Laughter From A 15-Month-Old

Smiles and laughter from my 15-month-old toddler son is contagious.
When he is in a good mood, he makes everyone at home so happy.


Lim Yiu-Shern - 26 September 2010 - 15-month-old

Look at how his eyes got smaller as his smiles got bigger?
Hahaha. He is indeed our son. Both hubby & I have small eyes. :)

He is so irresistibly cute that hubby and I can't stop hugging and kissing him. He does the silliest thing. And when he laughs...the whole world (erm...whole house) laughs with him! ;D

Saturday, September 25, 2010

Mini Nutella Puffs


24 & 25 September 2010 - Mini Nutella Puffs

I still have a packet of store-bought puff pastry in my freezer. Since I just bought a bottle of Nutella spread from Tesco, I decided to make something sweet with that packet of puff pastry. And I reckon that I will just whip out something sinful yet delicious. I think when it comes to Nutella, everything about it is delicious!

Earlier, I cut the pastry pieces into half (rectangles). Then the next day, I decided to make them even smaller so that we have more to share (mini squares).


This is what they look like all puffed up hot from the oven.


The inside oozes of delicious and warm Nutella spread.


Recipe: Mini Nutella Puffs

Ingredients:
1 packet of store-bought puff pastry (I use Kawan brand)
1 egg white
Nutella spread

Preheat your oven to 200 degree C. Slightly flour your tray.

1. Bring the packet of puff pastry to room temperature. Cut them to desired size.
2. Fill the center with Nutella spread (I used about a heaped teaspoon of it).
3. Pinch the edges with your fingers. Then use a fork to make the design.
4. Lastly, brush the top of the puff pastry with egg white.
5. Bake in pre-heated oven for about 15 minutes or until golden brown.
6. Cool slightly before serving.

Friday, September 24, 2010

Noisy Little Car Makes Shern So Happy

Was shopping at Tesco this afternoon when I decided to sign up for this credit card where I would get a free toy racing car for Shern.

It was one of those made-in-China kind in which runs on AA batteries, with very loud music and knows how to turn and reverse when knocked onto something.

When Shern sees it, he was ecstatic. He loves it. Loves its loud music (I ended up taking a Scotch Tape to cover 'speakers' to minimize the irritating music).

Look at his smiles while watching the car go to and forth, left and right.


After seeing Shern running after the car in the house, hubby & I ended up using our legs to make a circle so that Shern can watch the car in a small area.


Shern even tried to avoid letting the car knocking onto him.


Father and son playing happily. Shern loves it.


I guess no harm applying for credit card when I can get a free car to make my son so happy.
In fact, this card even gives me RM188 cash upon approval. And even after being charged rm50 for the bank fees, I still get to pocket RM138!

Thursday, September 23, 2010

Chocolate Swiss Roll


23 September 2010 - Chocolate Swiss Roll

Hubby loves Swiss Rolls. Up to date, I still have not made him one to enjoy yet. Since I was quite free today, I decided to bake one today. Came across HHB's blog which calls for a simple recipe.

I came across many obstacles while making this Swiss Roll.

First of all, I do now own a swiss roll pan/shallow pan, so I used my baking tray instead. But my baking tray has a square indent in the middle. But I just crossed my fingers and hoped it turned out alright.

This is the sponge layer just out from the oven. Just like HHB, I did not cool it in a plastic bag as stated in the recipe. I also covered it using another tray of the same size.


Secondly, while spreading the Nutella (chocolate hazelnut spread) on the sponge layer, I realized that I did not have enough. So what to do? I quickly melted some chopped Hershey's semi-sweet chocolate with some whipped cream to save the day.
And that is why I have 2 different colours on my sponge layer.


And because of the delay (I had to wait for the Hershey's chocolate spread to cool down), my sponge layer got dried and it was probably the reason why my swiss roll cracked upon rolling.

*Sigh* *Big sigh* *Bigger sigh.....*

Well, it was still roll-able, but it cracked. And because it cracked, I panicked and did not roll it evenly, which explains why the middle part stuck out at the ends. Hehe.

Overall, the texture is nice. Fluffy and moist. But it has a little egg-y smell initially before I spread the chocolate spread. You can't taste the egg-y smell though.

Overall, hubby says it is good although it looks a bit pathetic, with the cracking and uneven rolling. Well, let's just say this time 'it tastes better than its look' *winks


Recipe: Chocolate Swiss Roll (copied from Happy Home Baking's blog)

Ingredients:
3 eggs, bring to room temperature
65g sugar
80g cake flour (I used all-purpose flour)
20g unsalted butter, melted
2~3 drops vanilla extract

Method:
  1. Sift cake flour, set aside. Line a 9" x 12" (23 x 30cm) Swiss roll tray with parchment paper, set aside. Pre-heat oven to 180 degC.

  2. With an electric mixer, whisk eggs and sugar on HIGH speed for about 5 to 7 mins, until the batter double in volume and is ribbon-like (the beater should leave a ribbon-like texture when the batter is lifted up). Turn to LOW speed and whisk for another 1 to 2 mins. Whisking at low speed helps to stabilise the air bubbles in the batter.

  3. Add sifted cake flour into the batter in 3 separate addition. With each addition, use a spatula, gently fold in the flour until well blended. Take care not to deflate the batter.

  4. Add the melted butter and vanilla extract, fold with spatula until well blended.

  5. Pour the batter into the tray. Spread and smooth out the batter evenly. Bake for 10~15 mins*, until the surface turns golden browned or until a skewer inserted in the centre comes out clean.

  6. Remove tray from oven. Remove sponge layer from tray (with parchment paper still in tack), place it in a plastic bag**. Tie the plastic bag and leave it to cool. (Instead of using a plastic bag, I cover the sponge layer with another tray.)

  7. Upon cooling, remove the parchment paper, and turn the sponge layer with the 'skin' side down on a sheet of clean parchment paper. Spread with nutella (or any filling as desired) and roll up the sponge layer by lifting it up with the parchment paper. Place the rolled cake seam side down.
NOTE:
*Do not over bake the sponge layer, otherwise it will turn dry and may crack upon rolling.
** The reason for doing so is to keep the sponge layer moist for easy rolling.

Wednesday, September 22, 2010

White And Black Banana Loaf


21 September 2010 - White And Black Banana Loaf

Over-ripe bananas hanging in mum's kitchen....forcing me to bake using bananas as the main ingredient. I was sighing away because I did not have any new banana recipes in my to-bake list.

After browsing the net for awhile, I stumbled upon Ashlee's blog. As I am into 'marbling effects' lately, this recipe caught my eye.
And it looks easy enough for a midnight bake. Ashlee's first bake was not too successful as the batter was too runny, and in her second attempt, she tweaked the recipe by quite an amount and it turned out good.

I decided to try it out. However, I did not tweak the recipe by so much. I decided to omit the milk since I want to reduce the liquid in the batter. But I used more bananas because I feel that 1 to 1 1/2 bananas called by the recipe is too little.


I think overall, my Banana Loaf turned out great. The little brandy gave the fillings a hint of booze. The texture is moist. And it is not too sweet. And the marbling effect makes it such a lovely loaf.


But if I were to bake it again, I would put more bananas into it for a more banana texture. I dared not initially because I was afraid that mashed bananas will make the batter too watery since the liquid content in this recipe is a little on the high side.

Well, I guess I will try and see. So, 'til next time... (and it won't be long because my family finished the whole loaf in less than a day. So it must be good!)


Recipe: White And Black Banana Loaf (largely adapted from Ashlee's Veggie by Season blog)

1 1/3 c. all purpose flour
1 tsp. baking powder
½ tsp. salt
½ tsp. freshly grated nutmeg
1 ½ ripe bananas, peeled (I used 3 medium-sized bananas)
Squirt of fresh lemon juice
Grated zest of ½ lemon
1 tbsp. dark rum (I used brandy)
2 oz. bittersweet chocolate, finely chopped
1 stick plus 2 tbsp. room temperature butter
2/3 c. packed light brown sugar
1/3 c. sugar
4 large eggs
1 tsp. pure vanilla extract
½ c. whole milk (I omitted this)

Getting Ready:

Center a rack in the oven and preheat oven to 325 degrees. Butter an 8 ½ x4 ½ x 2 ½ inch loaf pan on an insulated baking sheet.

Whisk together flour, baking powder, salt and nutmeg.

In another small bowl, mash the bananas with lemon juice, zest, then stir in the rum.
Melt the chocolate and 2 tbsp. butter together in a microwave or saucepan over simmering water.

Working with a stand mixer fitted with the paddle attachment, beat butter at medium speed until creamy, about 3 minutes. Add the sugars and beat for 2-3 more minutes, until light and smooth. Add the eggs one at a time, beating well after each addition, then beat in vanilla. The batter will look curdled, and it will continue to look curdled as you add ingredients. Reduce the mixer speed to low and add half the flour mixture, mixing only until it is just incorporated. With the mixer running, pour in the milk (I omitted this) and when it is blended add the remaining dry ingredients.

Scrape down the bowl and mix in the mashed bananas. The batter will look even lumpier.
Pour a little less than half the batter into the bowl with melted chocolate and stir to blend. Drop alternating spoonfuls of both batters into prepared pan (or follow any of the marbling techniques on page. 229). Then, using a knife, swirl the batters taking care not to overdo it.

Bake for 1 hour and 20 – 30 minutes, or until a knife inserted into the center of the cakes comes out clean. Check after 30 minutes, if the cake browns too much, cover loosely with a foil tent.

Transfer the cake to a cooling rack and let it cool for 15 minutes before removing it from the pan. Continue to cool on the rack.

The Happiest Place On Earth

Every girl has a dream. Some dream of meeting their prince charming. Some dream of having a fairy-tale wedding. When I was a little girl, I also had a dream.

...I dream of visiting ALL the Disneyland Parks around the world...!

Although I have not even been to a single Disneyland Parks, I can imagine the happiness there. The laughter and the joy. The happy music.

Below are segments of Walt Disney Company which I intend to visit throughout my life:

- Hong Kong Disneyland, Hong Kong
- Disneyland Resort, California U.S
- Tokyo Disney Resort, Japan
- Disneyland Paris (Euro Disney Resort), France
- Shanghai Disneyland Resort (upcoming)

So first in my list would be Hong Kong Disneyland end of this year. I can't wait! I can't wait to bring out the child in me!
I know I would just squeal when I see Mickey there! *grin

Monday, September 20, 2010

Oreo Cheesecake Squares


20 September 2010 - Oreo Cheesecake Squares

Since the cheesecake brownies I baked two days ago is now in our stomach, I decided to bake another cheesecake. This time, I want to use Oreo cookies as the base since my little sis loves Oreos.

So I modified the recipe using my favourite cheesecake squares recipe. I also added in some crushed Oreo cookies in the cream cheese filling for that extra crunch.

This is what came out from the oven after a night's chill in the fridge.


The texture is so good. The added crunch of the crushed Oreos on the cream cheese filling is so satisfying. I'm starting to love homemade cheesecakes.

Chill the squares for easier cutting. Also make sure you have a sharp knife and a damp cloth nearby so you can wipe off the knife between cuts.


I wonder how long this 16 pieces of squares can last in our house? :P


Recipe: Oreo Cheesecake Squares (largely adapted from
Joy Of Baking)

Graham Cracker Crust:
2 cups (200 grams) crushed Oreo cookies
2 tablespoons (30 grams) granulated white sugar
1/2 cup (113 grams) unsalted butter, melted

Cheesecake Filling:
2 - 8 ounces (454 grams) cream cheese, softened
1/2 cup (100 grams) granulated white sugar
1 tablespoon fresh lemon juice
1 teaspoon pure vanilla extract
2 large eggs
crushed Oreo cookies

Cheesecake Squares: Preheat oven to 325 degrees F (160 degrees C) and place the rack in the center of the oven. Have ready a 9 x 13 x 2 inch (23 x 33 x 5 cm) square baking pan that has been lined with aluminum foil across the bottom and up two opposite sides of the pan.

Graham Cracker Crust: In a small bowl combine the Oreo cookie crumbs, sugar, and melted butter. Press mixture evenly over the bottom of the prepared pan. Bake in preheated oven for 10 minutes. Set aside to cool.

Increase the oven temperature to 350 degrees F (180 degrees C).

Cheesecake Filling: In the bowl of your electric mixer, or with a hand mixer, beat the cream cheese until smooth. Add the sugar, lemon juice, and vanilla extract and beat until smooth. Add the eggs, one at a time, beating until incorporated. Scrape down the sides of the bowl, as needed. Fold in the 1/2 cup Oreo crumbs. Pour the cheesecake filling over the graham cracker base and bake for about 20 minutes or until the cheesecake batter is just set.

Remove from oven and place on a wire rack to cool. Place in the refrigerator for a few hours to make the squares easier to cut. To cut into squares - place on a cutting board, remove the foil, and with a sharp knife, cut into 2 inch squares. Have a damp cloth on hand to wipe the knife between cuts.

Makes about 24 - 2 inch (5 cm) squares.


Cheesecake Brownies


19 September 2010 - Cheesecake Brownies

I came across David Lebovitz's blog last week while doing some blog hopping. I must say that his blog is so awesome - full of mouth-watering photos of great recipes. I was immediately hooked when I saw his Cheesecake Brownie Recipe.

Since my sis & I were craving for some cheesecake comfort, this was what I baked yesterday on a Sunday afternoon.
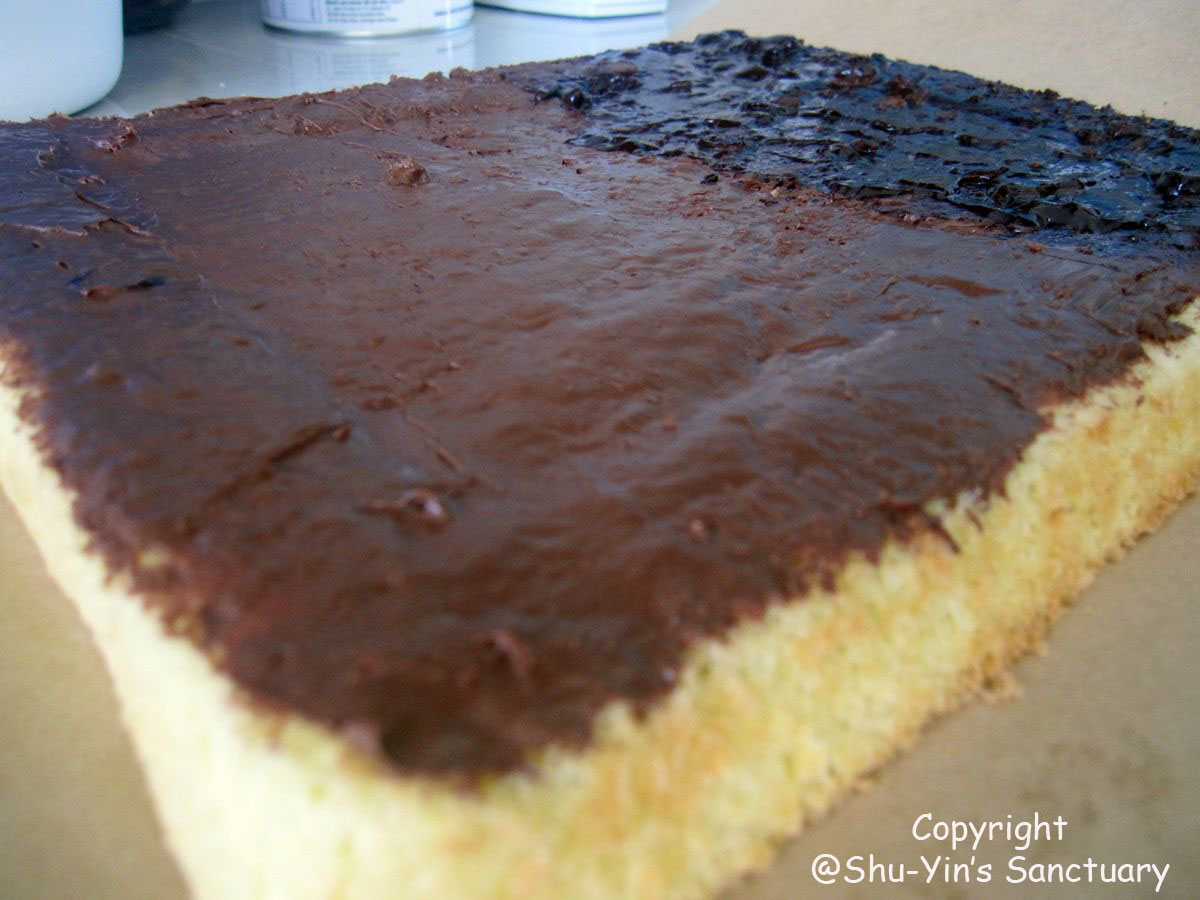
This is a photo of the cheesecake brownie batter just seconds before I popped it into my good 'ol portable oven.


And this is the result of it 25 minutes later. You can smell it when it is almost done!


This cake is very chocolate-y rich. Can you imagine a cake where a recipe calls for chocolate pieces, cocoa powder and chocolate chips in the same batter? Well, gooey-rich I must say. ;)

And I tweaked the recipe a little to give a little lemon-y flavour by adding 1 tbsp of fresh lemon juice to the cream cheese. This provides a bursting tangy flavour to the salty cream cheese. The combination of that with the rich chocolate brownie was amazing!


This is definitely one of my favourite recipes! And I won't think twice about baking this again sometime very soon. It is so rich and moist and oohh...so lovely!

It sure didn't take long for us to finish it up. Although rich, not a single piece was left as of writing. This delicious cheesecake brownies did not even last a day! :)


Recipe: Cheesecake Brownies (copied from David Lebovitz's blog)

One 9-inch (23cm) square pan

6 tablespoons (85g) unsalted butter, cut into pieces
4 ounces (115g) bittersweet or semisweet chocolate, chopped
2/3 cup (130g) sugar
2 large eggs, at room temperature
1/2 cup (70g) flour
1 tablespoon unsweetened cocoa powder
1/8 teaspoon salt
1 teaspoon vanilla extract
1/2 cup (80g) chocolate chips

8 ounces (200g) cream cheese, at room temperature
1 large egg yolk
5 tablespoons (75g) sugar (I reduced to 65g)
1/8 teaspoon vanilla extract

1. Line a 9-inch (23cm) square pan with foil, making sure it goes up all four sides. Use two sheets if necessary. Mist with non-stick spray or grease lightly.

2. Preheat oven to 350 degrees (180C).

3. In a medium saucepan, melt the butter and chocolate over low heat, stirring until smooth. Remove from heat and beat in the 2/3 cup (130g) sugar, then the eggs.

4. Mix in the flour, cocoa powder and salt, then the vanilla and chocolate chips. Spread evenly in the prepared pan.

5. In a separate bowl, beat together the cream cheese, the yolk, 5 tablespoons (75g) of sugar, and vanilla (I added in the lemon juice here) until smooth.

6. Distribute the cream cheese mixture in eight dollops across the top of the brownie mixture, then take a dull knife or spatula and swirl the cream cheese mixture with the chocolate batter.

7. Bake for 35 minutes (mine only took 25 minutes), or until the batter in the center of the pan feels just set.
Let cool, then lift out the foil and peel it away. Cut the brownies into squares.

Storage: These will keep in an airtight container for a couple of days. They also freeze well, too.

LinkWithin